Polka dots are one of my go-to patterns. I love them on dresses, glassware, and even doors. You just can’t go wrong with something covered in cute dots! In fact, I use the pattern so much that I pretty much consider it a neutral, perfect for mixing with florals and stripes.
So what on earth could I possibly put more polka dots on? A wood tray of course! I’m paired up with DecoArt and some of my favorite blog friends to share how you can DIY one thing five ways. We each started with the same exact unfinished wood tray and created 5 completely different, easy to DIY, looks.

Time: 1 hour + drying time
Supplies: Americana Multi-Surface paint in Shrimp and Cotton Ball / wood tray / wood stain / foam brush / foam pouncer
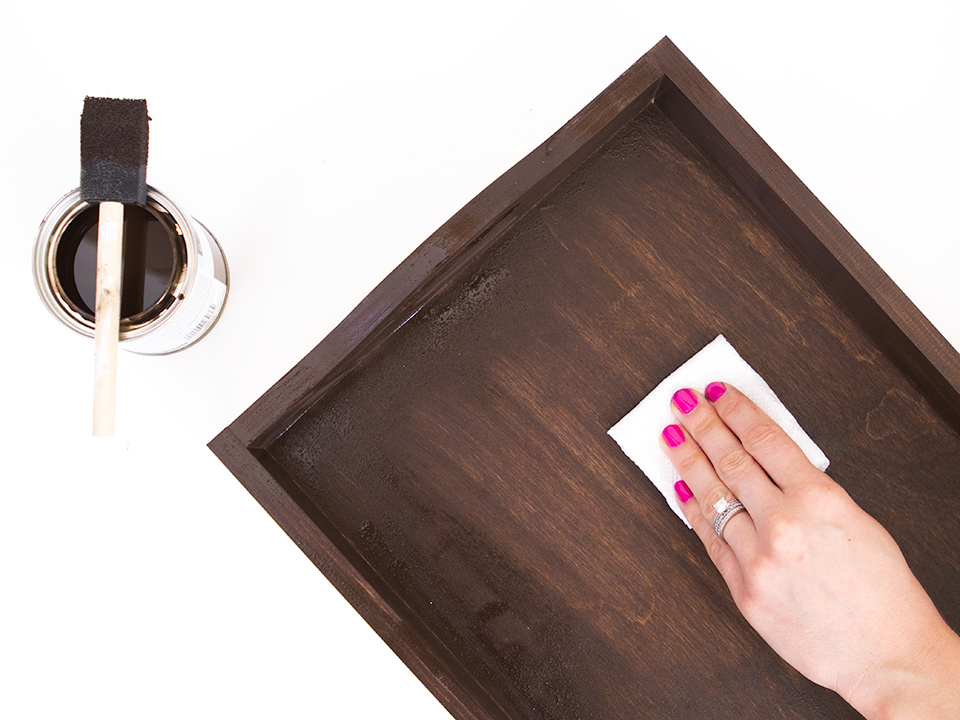
Step 1: Apply wood strain in any color you like (I used dark walnut) using a foam brush. Paint the stain on in the direction of the wood grain. This part can be pretty messy so make sure you cover your table top and I’d recommend wearing gloves.
Step 2: Remove the excess stain using a paper towel. Allow the tray to dry completely.
Step 3: If you want to make the same coral blush colored dots as I did, mix equal parts of Cotton Ball and Shrimp Americana Multi-Surface paint on a paper plate or tray. Then place the foam pouncer (I used the 1.5″ one) in the paint and cover the bottom of the sponge with an even layer of paint.
Step 4: Lightly press the foam pouncer onto the tray and turn it left and right slightly to create a solid polka dot. Be careful to not press too hard because the paint will bleed and the edges of the circle will be uneven. You can apply the dots in a random pattern, like I did, or you can apply them in more of a grid. Once you finish, you may notice some spots are uneven. That’s no problem—just apply the paint again in the same way once the first coat of paint has dried. You can also touch up a few areas with a tiny paint brush. Once the paint is completely dry your tray is ready to be used!
Note: This is optional, but if you plan on using your tray a lot, I recommend sealing it with a clear varnish once the paint is completely dry. This will help prevent the paint from chipping and make the wood water resistant.
Check out the other ways to DIY a wood tray:
A Bubble Life
Oleander + Palm
Pars Caeli
The Crafted Life
Want to DIY your own tray? We’re giving away a $50 Amazon gift card so you can buy all the supplies you need to create your own tray. Enter below to win!
This post was created in partnership with DecoArt. Thanks so much for supporting the brands that keep this blog going!


I love polkadots so much! This tray is absolutely gorgeous!
Super cute and springy!
I love these colors!!
It’s SO fun!! Well done!
Soooo cute, Sarah! Love the way it looks with your amazing pink sofa <3
Fun! I’d love to see some wall art!
love this…i’m a dot person so this is just perfect!
5 ways to diy a bag lunch!
Would love to add this to my daughter’s changing table to hold items!
Some DIY art!
DIY Throw blankets!!!! #5waysToDIY
So cute!
Love stain and paint on the same piece, great looking tray! :)
I would love to see outdoor decor diy!
Super cute, quick, and easy! Love it!
Some kind of DIY with indoor potted plants!
Love it! Polka dots are one of my go to patterns as well. I did curtains and my garbage can! xo
You seriously can’t go wrong with them! And a garbage can! That sounds like an amazing idea!!